
By default the Divi WordPress theme already comes with a wide range of great fonts to choose from, but what if you want to use a font that isn’t already baked in to Divi?
In this short guide I’ll show you how you can use custom OTF, TTF or WOFF fonts with Divi – and don’t worry, it’s easier than you might think.
Before we get started there are three things that you will need:
- A Divi child theme: necessary to keep the changes in place every time the theme is updated.
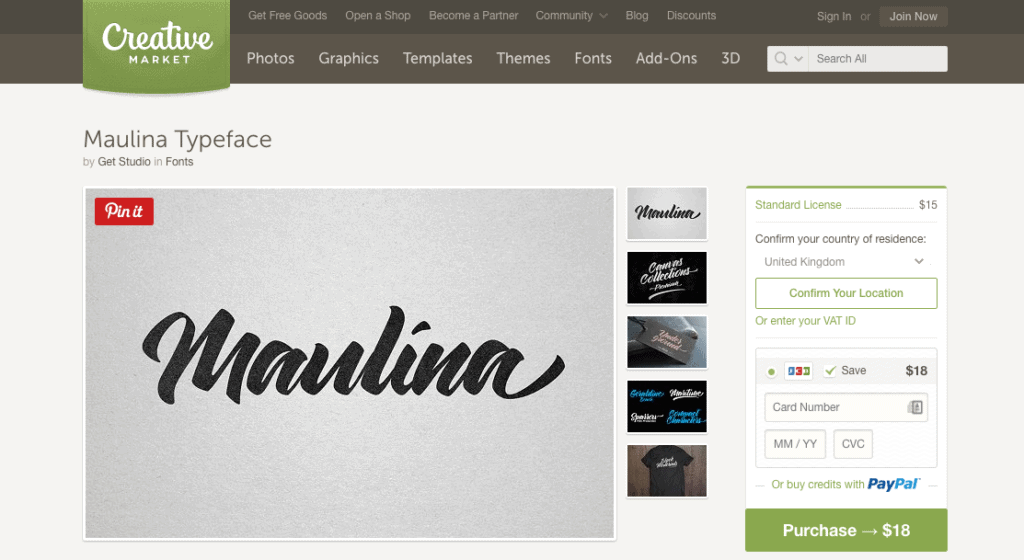
- Your custom font: your font should be in a OTF, TTF or WOFF format (if you don’t have a font yet I recommend checking out Creative Market as they have a whole bunch that are good value – they also offer freebies each week).
- Access to your website: you will need access to your website via FTP/SFTP/cpanel.
Once you have those three things we can get started…
Step 1 – Create A New Font Directory
The folders where your website files live are called ‘directories’ and to install custom fonts on your Divi site we will need to create a new one called ‘fonts’.
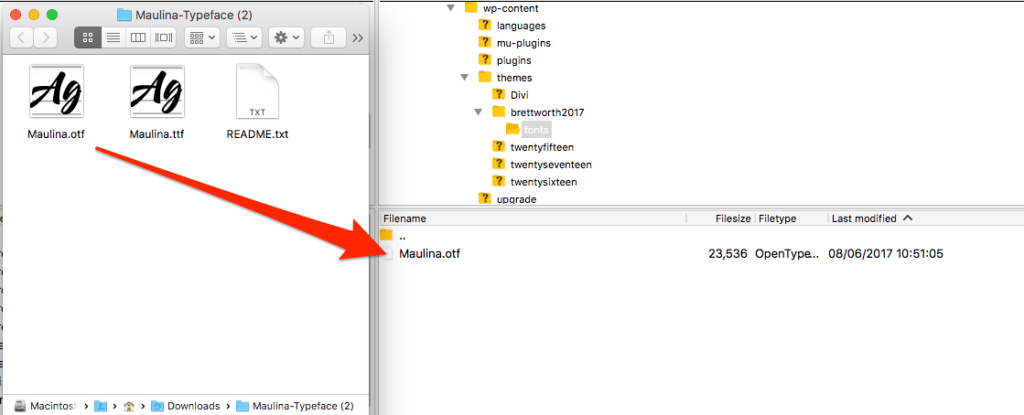
Access your child theme directory (‘wp-content/themes/your-child-theme’) via FTP/SFTP/cpanel. Create a new directory within your child theme and call it ‘fonts‘.

Step 2 – Upload Your Custom Fonts
Open the ‘fonts‘ directory you just created and then drop your custom font files into the directory.
Step 3 – Load Your Fonts
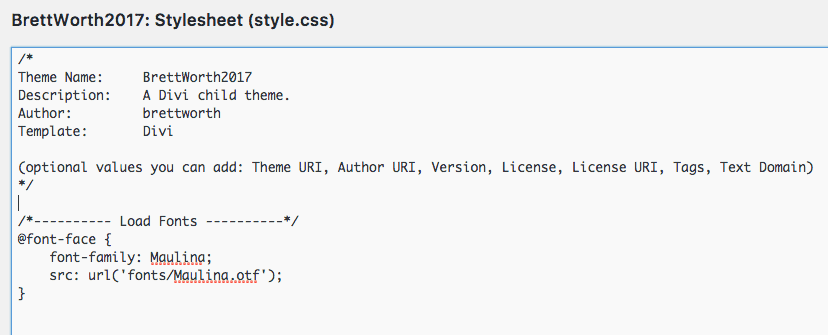
Our next step is to tell the system where our fonts are stored so that they can be used. To do this we need to edit our ‘style.css‘ file. You can do this through FTP or through WordPress directly by going to Appearance > Editor.
In the style.css file paste this code at the bottom:
/*---------- Load Fonts ----------*/
@font-face {
font-family: Font-Name;
src: url('fonts/Font-Name.otf');
}
Like this…

Now all you need to do is swap out the parts that say ‘Font-Name‘ with the actual name of your font. In my example the font is called ‘Maulina‘ so I’ll replace ‘Font-Name‘ with that, like so…
/*---------- Load Fonts ----------*/
font-family: Maulina;
Next, I will swap out the file name in the ‘src: url’ part of the code. This code points the system to where your font file is found so it has to be the exact file name for your font. In my example my file is called ‘Maulina.otf’ so I will swap out ‘Font-Name.otf’ with that, being careful to leave in the ‘fonts/…‘ part of the code. So it would look like this
/*---------- Load Fonts ----------*/
src: url('fonts/Maulina.otf')
If your font has a different file extension be sure to replace that too, so for example if my file was a TTF file instead of a OTF file it would look like this:
/*---------- Load Fonts ----------*/
src: url('fonts/Maulina.ttf')
The final code should look similar to this:
Step 4 – Use Your Fonts
The last step is to decide where you would like your fonts to be used on your site. For this, you will need to add some CSS to either your child theme ‘style.css‘ file or in the Custom CSS section found in Divi > Theme Options.
You may choose something simple like this…
/*---------- Font Style ----------*/
h1 {
font-family: Maulina;
font-size:38px;
}
This would apply your custom font to all of the h1 headings on your site and you can do this for any heading or body text such as h2, h3, or body. But what if you only want to apply the font in some modules?
By using the Advanced tab in the individual Divi modules you can give specific modules an easy to recognise label. You can then use these labels to apply your custom fonts to this module only.

Here I have added ‘welcome’ to the CSS Class of a text module on my page. Now, by adding the code below to my ‘style.css‘ file I can use the custom font only for this specific text module, like so…
/*---------- Font Style ----------*/
.welcome h1 {
font-family: Maulina, Open Sans, sans-serif;
font-size: 38px;
}
In simple terms the code tells the system that if there is a module with a CSS Class called ‘welcome’ then any h1 heading within that module will be the Maulina font at size 38px. As an added measure I’ve also added a backup font, Open Sans, if for some reason Maulina can’t be loaded.
Here’s how it looks on the site itself; the text module on the left contains our custom CSS Class and a h1 heading whereas the module on the right has a h1 heading but no custom CSS Class:

This could be useful for creating some pretty fun and exciting sections of your site without interfering with the other headings.
That’s all for this short guide, I hope you found this useful!

0 Comments