
[Updated: March 2019]
A 404 page is an essential (but often overlooked) part of your website experience. When your visitors follow a broken link or type in an incorrect web address you want to be sure that they are going to be taken care of.
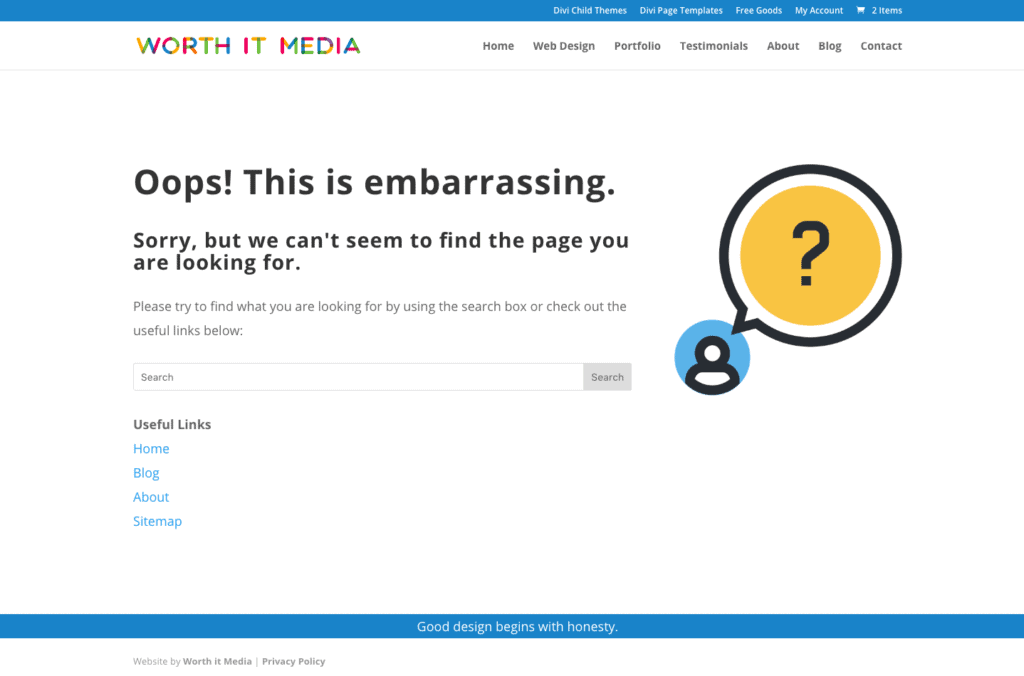
Your 404 page offers an ideal way to delight your lost visitors and bring them back to your content. By default the Divi 404 page leaves a lot to be desired, here’s how it usually looks…
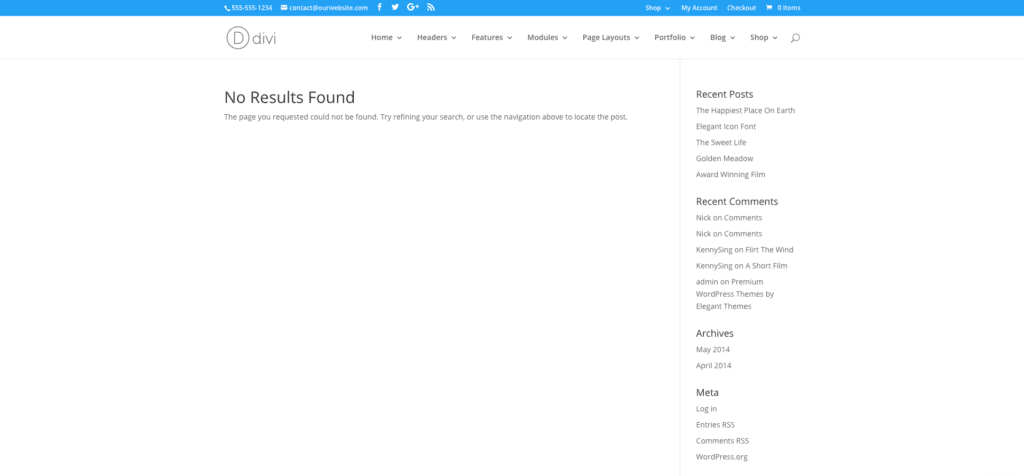
… hardly inspiring, right?
Even if the rest of your website is well-designed this page can make all your hard work come undone.
It’s not attractive, it offers no personality and it’s not in line with the rest of your branding.
But the real problem with the Divi 404 page is that is just isn’t all that useful.
Sure, it informs visitors that you can’t find the page they are looking for but then what..? What if we had no sidebar and no search icon in the menu? What would your lost visitors click? Where would they go from here?
Thankfully improving your Divi 404 page and making it useful to your website visitors is pretty straightforward.
In this short guide I’m going to be showing you how I create custom 404 ‘page not found’ pages for Divi.
The method we will be using involves creating your page as a Divi Layout and then adding the shortcode into the 404 page template.
Before we get started it is a very good idea (read: essential) to be using a child theme for your website. A child theme will ensure that your changes remain unchanged whenever you update the Divi theme instead of losing them.
Alright, so now that’s out of the way – here we go!
1. Create Your Divi Page Layout
Our first step is to create a new Divi page Layout using the Divi Page Builder.
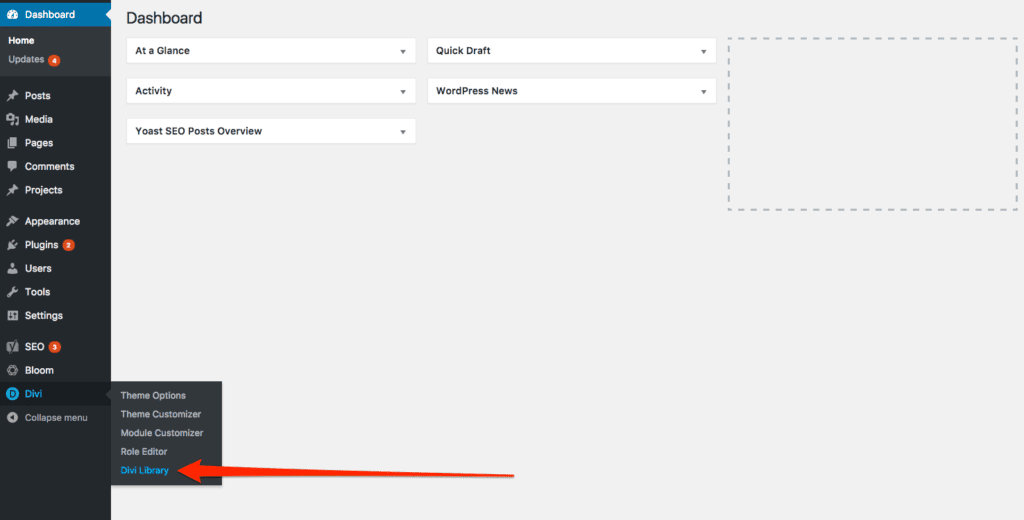
- We start off by signing in to our site and then going to Divi > Divi Library.
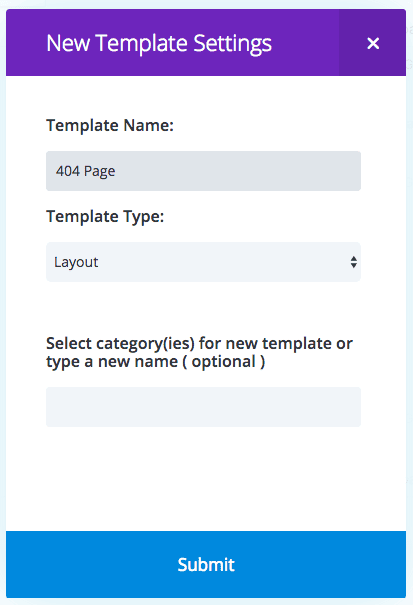
- In the Layouts page click on ‘Add New’. Now name your new template ‘404 Page’ (or anything else you like) and then select ‘Layout’ as the Template Type.
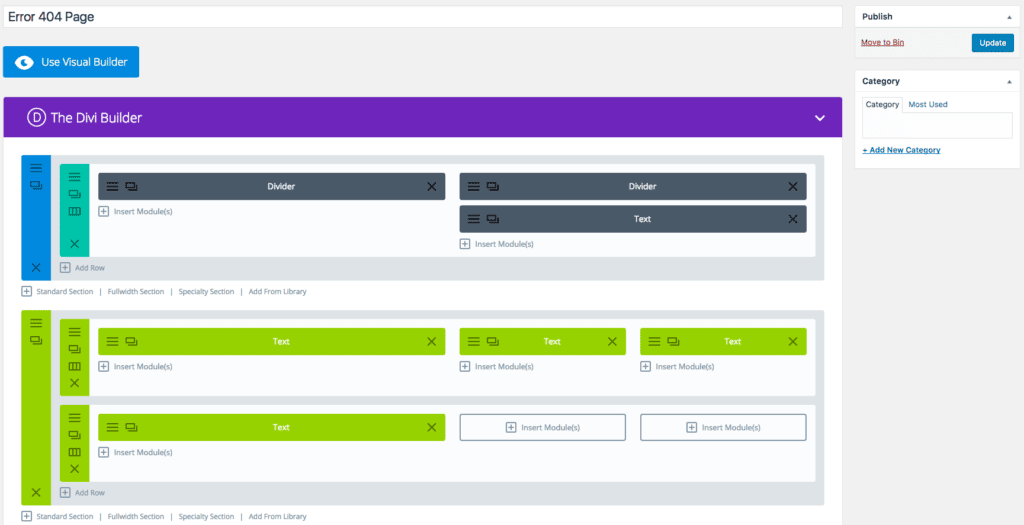
- You can now create your 404 page layout using the Divi Builder. You can design it however you like but you may want to include: a ‘page not found’ heading, a search box, links to other useful pages on your site and a message to tell your visitors that you couldn’t find the page they were looking for.
Side note: Talk about great timing. One of my favourite blogs, webdesignerdebot.com, just released a new post titled 5 ways to use 404 pages well. If you are feeling stuck for ideas about what to add to your 404 page then be sure to check it out.
Once you’ve created your design be sure to save/publsih your layout.
2. Create A 404 Template In Your Child Theme.
With your page designed the next thing to do is to get the page content into your 404 page.
In Divi the 404 page is handled by a php template. The Divi theme has a file named ‘404.php’ (no surprises there!) and if you create a new file with the same name and place it in your child theme folder it will allow you to change how things work.
Quick tip: I have created a handy template file which will help speed up this process. By downloading this free Divi 404 template you don’t have to write the code yourself. Download the custom 404.php template here and then follow along with the steps below, skipping over any parts which have already been done for you.
- Open up a text/code editor and save your file as ‘404.php’. You may find that you have to change the file extension if your text editor adds one automatically, for example on Textedit it will try to add .rtf. We want our file to be a dot php file (.php).
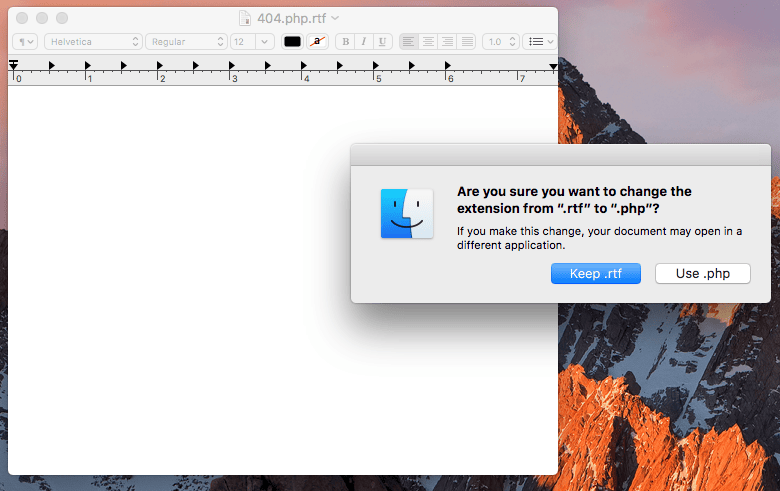 I recommend using a code editor (there are many free ones available) if you have one as it won’t try to change the file extension like a standard text editor might.
 - Our new 404 page will include our header and footer. Then, between those will be our page content.
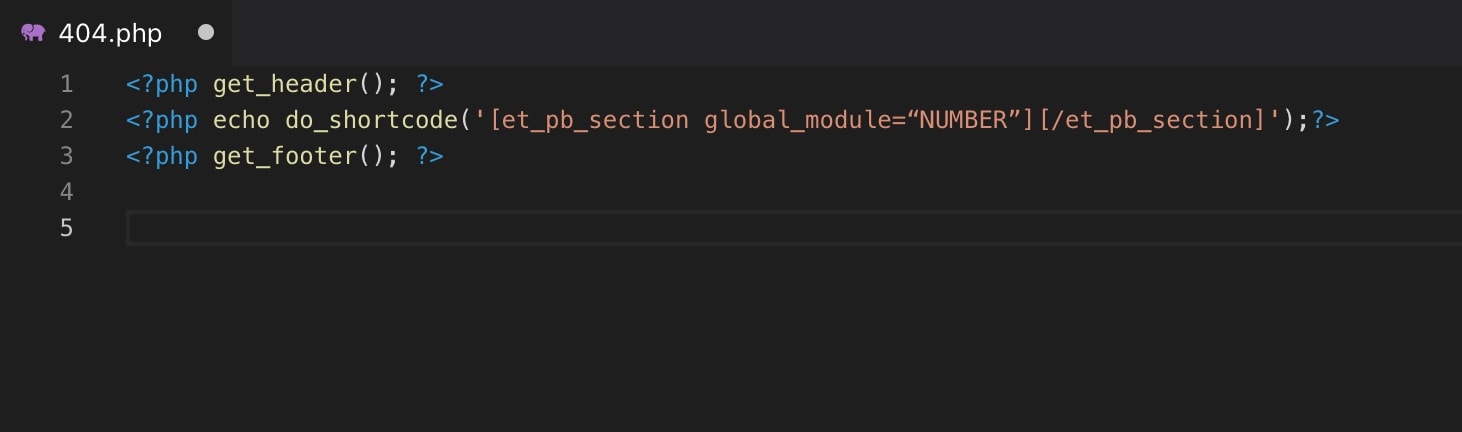
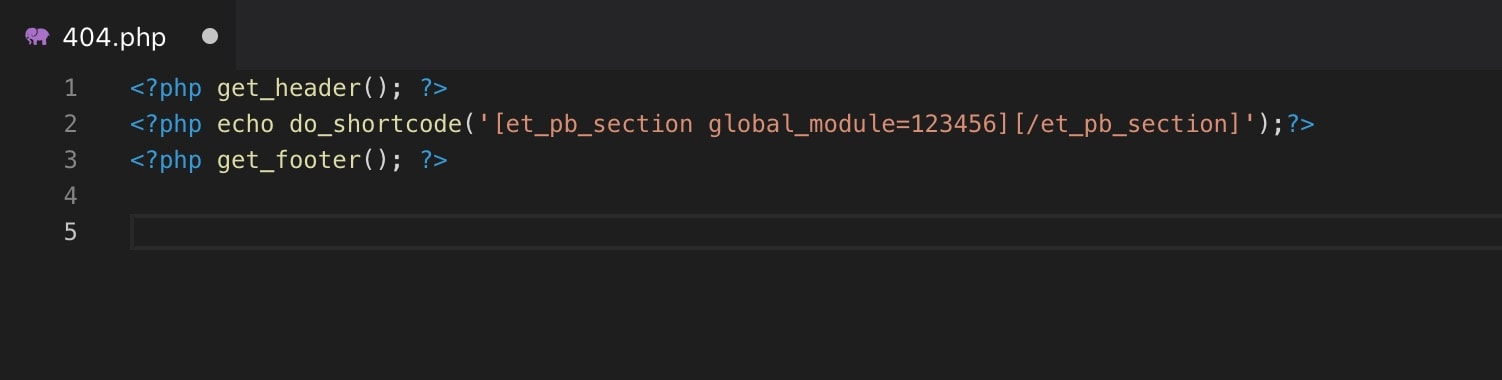
- The middle line of code requires us to head back to our 404 page layout. Open up the layout and then in the URL bar we are looking for a string of numbers.

These numbers are like an identifying code for your specific Divi layout. It will look something like this:www.yourwebsite.com/wp-admin/post.php?post=123456&action=editThe highlighted number part above is what we need. It will be between the ‘=’ and the ‘&’, so go ahead and copy it.
- Back in our 404.php file paste in the number after ‘module=”‘. If you are using the template file simply replace ‘NUMBER‘ with your number. Be sure that your code looks like it does here, if you accidentally delete a bracket then it won’t work. Once you’re done, save your file.
- Now you will need to upload this to the child theme folder for your website. There’s a few ways to do this and it will depend on your setup. You’ll need to access your website files via FTP (either through a website/C Panel or via an FTP app).
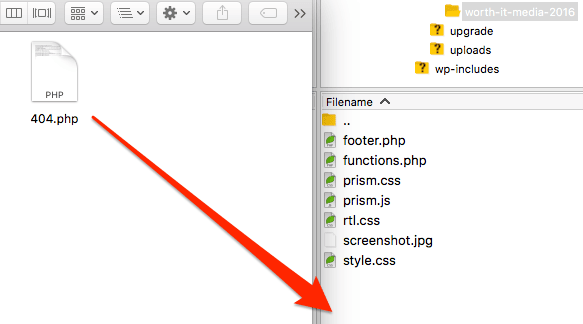 Drop the 404 file into your child theme.
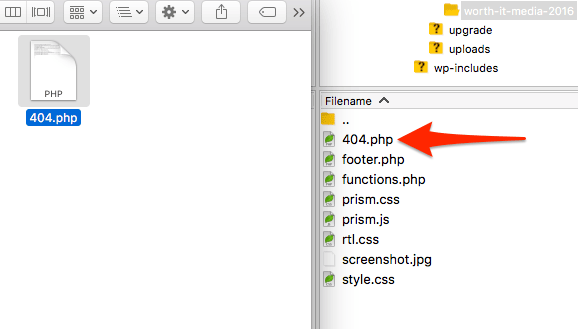
And… that’s it! Congratulations.
Your new 404 page will now be active and any visitors who follow a broken link will now see your page template.
What I really like about this method is that you can go back and change your 404 page at any time by simply going to Divi > Divi Layouts and then editing your 404 page layout. Any changes you make to this layout will automatically be reflected in your live 404 page.

Hi! Thanks for this. when I create the layout and open it up, it doesn’t show up with a link, just the edit page. any thoughts? Pic attached! https://uploads.disquscdn.com/images/3d2185aa21422311408451f7bff115405620ded892330e1d8d96f3603888494f.jpg
Hi Really nice work, I worked fine for me, however I need to hide the old header and I’m using the Mhmm header I tried to loose the header but it breaks the site, struggling to just hide it – any thoughts?
https://evolvetechnologies.co.uk/help
Unfortunately don’t work…
Hey Alexandr, are you using a child theme? I’ve just had another read through and everything seems to be up to date. Any way to show me what you’ve got so far?